


Streamlining Stock Keeping With Quickbooks - How to Replenish Items
July 14, 2023 19:20 pm
Anuradha Mitra
Introduction:
We showed you how to set up a store with QuickBooks as the backend system in Part 1, and in Part 2 we will walk you through how to replenish items in QuickBooks. Efficient inventory management is crucial for businesses of all sizes. QuickBooks, a popular accounting software, offers a robust inventory system that simplifies the replenishment process. In this article, we will explore how to replenish items in QuickBooks, focusing on two methods: purchasing an item from a vendor for cash and procuring an item “on account.”

- Purchasing an Item from a Vendor for Cash:

To initiate a purchase through QuickBooks’ Purchase API and replenish your inventory, follow these steps:
Step 1: Establish API Connection:
Begin by establishing a secure connection with QuickBooks’ Purchase API, ensuring proper authentication and authorization mechanisms. This involves generating API keys or tokens and setting up the necessary credentials.
Step 2: Construct a Purchase Object:
Create a Purchase object that encapsulates all the required information for the procurement process. This object should include vendor details, item specifics, quantities, prices, and any other relevant data.
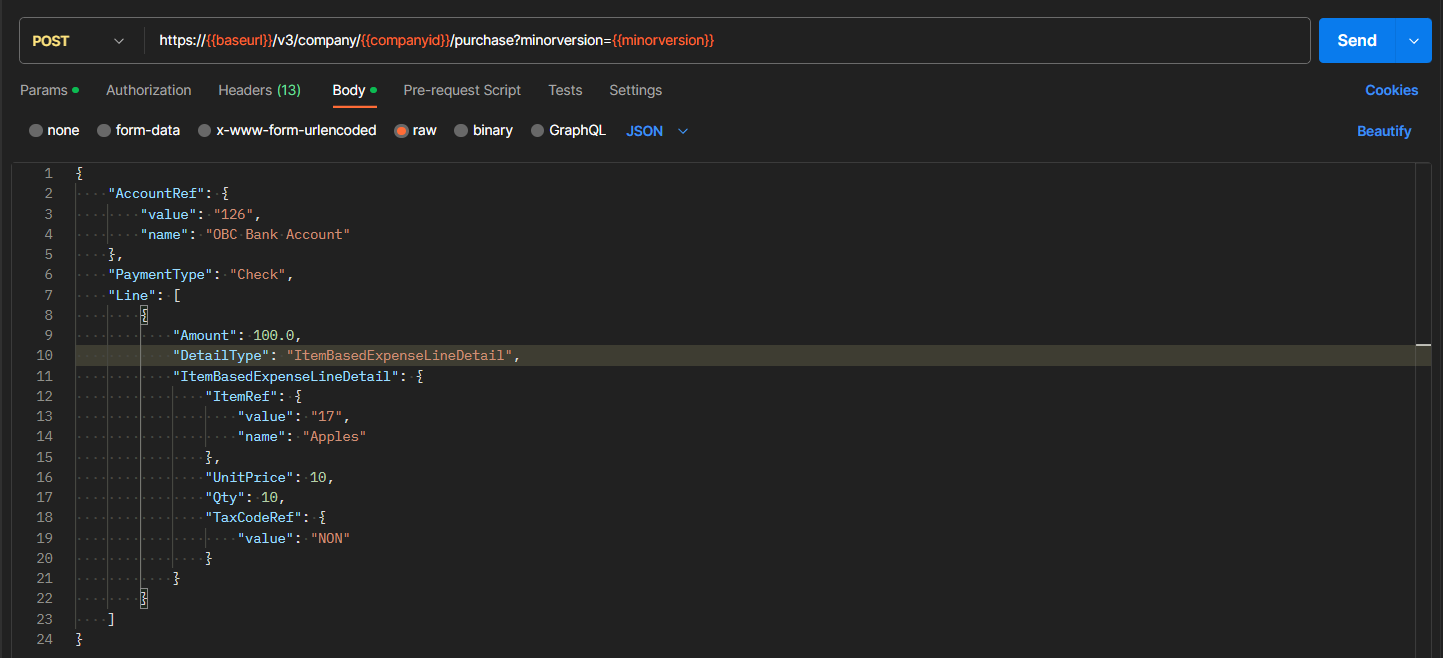
Step 3: Make the API Call:
Utilize the Purchase API endpoint designed specifically for purchase requests. Send the Purchase object as the payload or request body in your API call to initiate the procurement process.
Example of Request Body and URL for Purchase API:
Step 4: Handle the API Response:
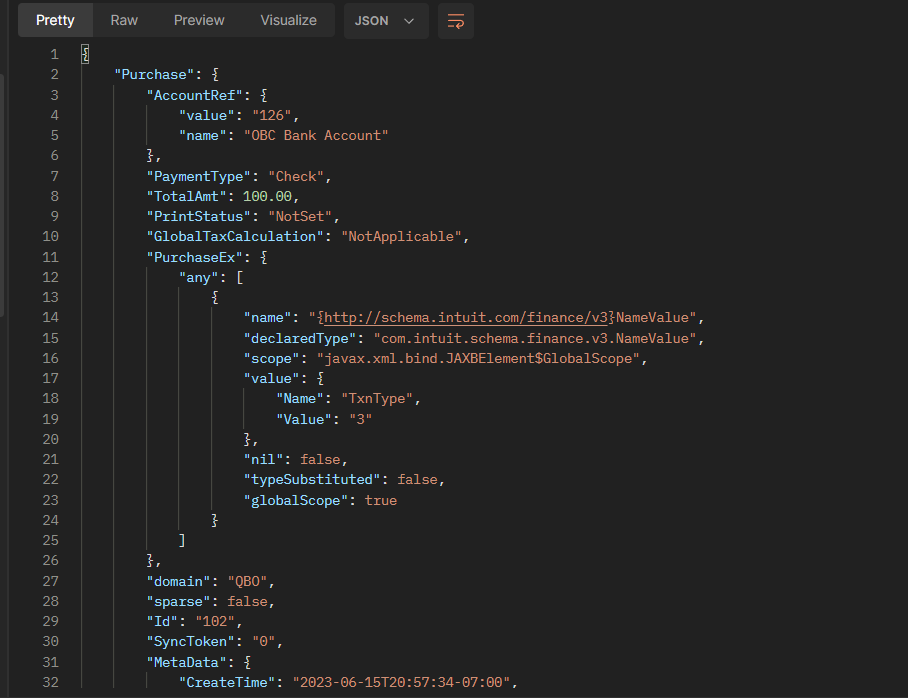
Once the API call is made, handle the response appropriately. Check for error messages or status codes to determine the success or failure of the purchase. Extract relevant information from the response, such as the purchase ID, timestamps, or additional data provided by the API.
Example: Response body:
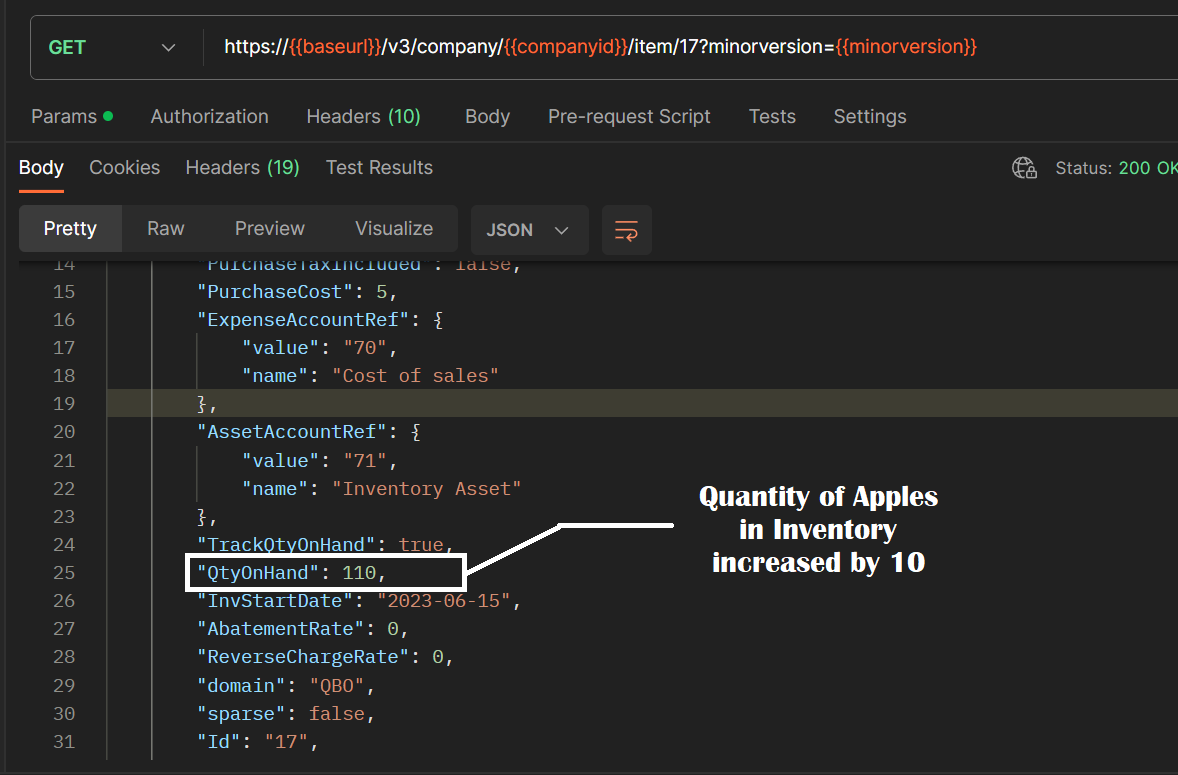
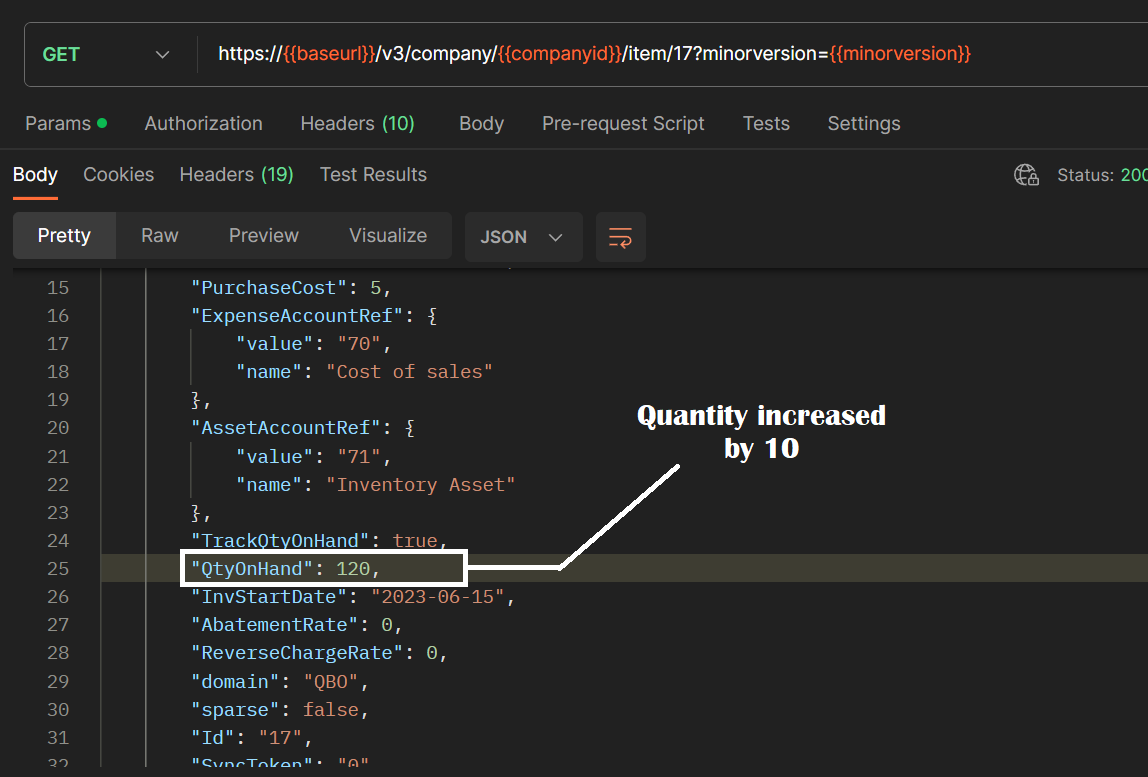
Note: We can check the quantity of the item for the change by calling the Get Item API, as shown below. In this case, the quantity of apples increased by 10.
1.1. Procuring an Item from a Vendor “On Account”:

If you need to procure an item “on account,” you can leverage QuickBooks’ Bill API. Follow these steps:
Step 1: Create a Bill Object:
To record the procurement transaction, create a Bill object that contains all the necessary details. Include vendor information, item specifics, quantities, costs, and any other relevant information related to the procurement.
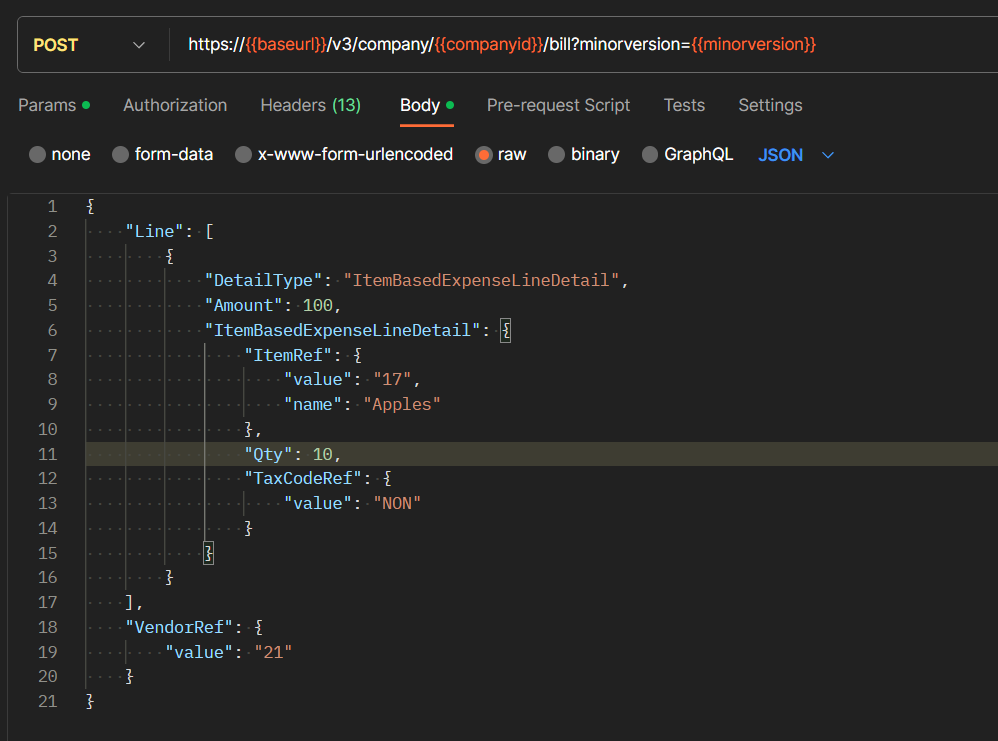
Step 2: Make the API Call:
Utilize the Bill API endpoint, sending the Bill object as the request body. This API call triggers the creation of the bill and records the procurement transaction in QuickBooks.
Step 3: Handle the API Response:
Properly handle the response from the API call. Check for error messages or status codes to determine if the bill creation was successful. Extract relevant information from the response, such as the bill ID and timestamps, for record-keeping purposes.
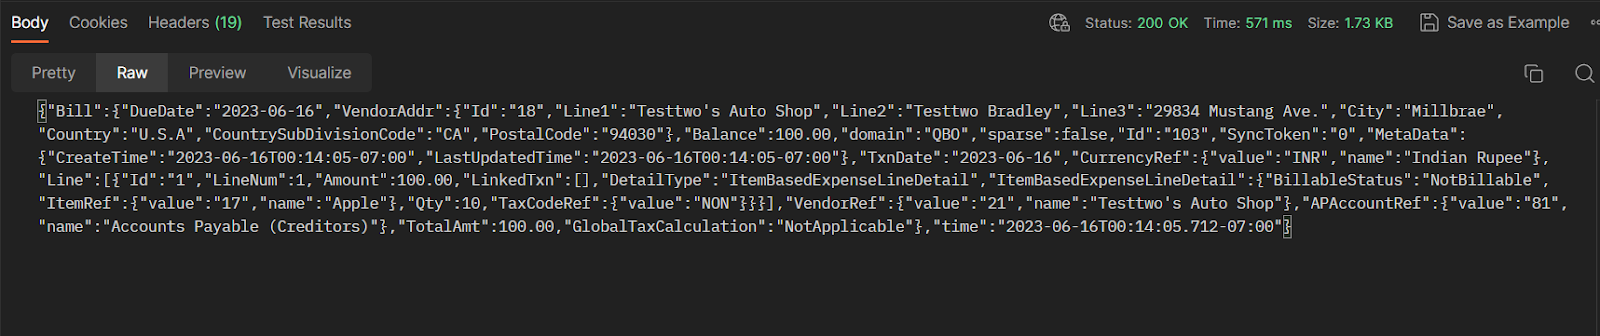
Note: We can check the changes in quantity of Item ‘Apple’ using Get Item API. In this case, the quantity of apples increased by 10.
Conclusion
With QuickBooks’ inventory system and its powerful Purchase and Bill APIs, replenishing items becomes a streamlined process. Whether you’re making cash purchases from vendors or procuring items “on account,” following the steps outlined in this article will help you maintain accurate inventory levels and ensure a smooth procurement workflow. Utilize the power of QuickBooks to enhance your inventory management capabilities and drive the success of your business.
In the next part we will discuss regarding item expensed
If you want to know more about how we can help, book a meeting for a free consultation.